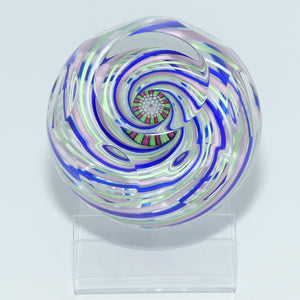
{"id":7989595635940,"title":"John Deacons Scotland the Brave medium paperweight | Amethyst","handle":"john-deacons-scotland-scotland-the-brave-amethyst-medium-paperweight","description":"John Deacons Scotland | Scotland the Brave \u003cbr\u003e\u003cspan data-mce-fragment=\"1\"\u003eAmethyst colour\u003cbr\u003eMedium size paperweight\u003c\/span\u003e\u003cbr\u003e\u003cbr\u003eA pair of crossed National flags of Scotland surrounded by a ring of Millefiori canes, interspersed with John Deacons Scotch Thistle signature canes | adhesive label to base\u003cbr data-mce-fragment=\"1\"\u003e\u003cbr\u003eApprox 6.5cms (2 1\/2\") wide\u003cbr\u003eApprox 5cms (2\") tall\u003cbr\u003e\u003cbr\u003eIn excellent condition\u003cbr\u003eGUARANTEED free from damage and repair","published_at":"2023-06-17T06:00:15+10:00","created_at":"2023-06-13T11:12:50+10:00","vendor":"John Deacons Scotland","type":"Paperweight","tags":["Millefiori"],"price":10000,"price_min":10000,"price_max":10000,"available":true,"price_varies":false,"compare_at_price":null,"compare_at_price_min":0,"compare_at_price_max":0,"compare_at_price_varies":false,"variants":[{"id":43976750268644,"title":"Default Title","option1":"Default Title","option2":null,"option3":null,"sku":"","requires_shipping":true,"taxable":true,"featured_image":null,"available":true,"name":"John Deacons Scotland the Brave medium paperweight | Amethyst","public_title":null,"options":["Default Title"],"price":10000,"weight":1250,"compare_at_price":null,"inventory_management":"shopify","barcode":"","requires_selling_plan":false,"selling_plan_allocations":[]}],"images":["\/\/www.roundaboutantiques.com.au\/cdn\/shop\/files\/amethyst_1a_c37c8846-5860-45b1-9af9-7547b2ac6d0f.jpg?v=1686618996","\/\/www.roundaboutantiques.com.au\/cdn\/shop\/files\/amethyst_1b_371b1a1d-e2af-4c38-9698-549387ab2fa6.jpg?v=1686618996","\/\/www.roundaboutantiques.com.au\/cdn\/shop\/files\/amethyst_1c_129f39bb-fcc8-4548-be50-1fbef75f92a4.jpg?v=1686618997","\/\/www.roundaboutantiques.com.au\/cdn\/shop\/files\/amethyst_1d_380a74a7-565f-442e-b74f-63222291f23c.jpg?v=1686618997","\/\/www.roundaboutantiques.com.au\/cdn\/shop\/files\/amethyst_1e_f42f0bc9-8f7e-4bdd-9262-b946a2a6a75c.jpg?v=1686618997"],"featured_image":"\/\/www.roundaboutantiques.com.au\/cdn\/shop\/files\/amethyst_1a_c37c8846-5860-45b1-9af9-7547b2ac6d0f.jpg?v=1686618996","options":["Title"],"media":[{"alt":"John Deacons Scotland | Scotland the Brave Amethyst medium paperweight","id":46054291865828,"position":1,"preview_image":{"aspect_ratio":1.0,"height":1250,"width":1250,"src":"\/\/www.roundaboutantiques.com.au\/cdn\/shop\/files\/amethyst_1a_c37c8846-5860-45b1-9af9-7547b2ac6d0f.jpg?v=1686618996"},"aspect_ratio":1.0,"height":1250,"media_type":"image","src":"\/\/www.roundaboutantiques.com.au\/cdn\/shop\/files\/amethyst_1a_c37c8846-5860-45b1-9af9-7547b2ac6d0f.jpg?v=1686618996","width":1250},{"alt":"John Deacons Scotland | Scotland the Brave Amethyst medium paperweight","id":46054291931364,"position":2,"preview_image":{"aspect_ratio":1.0,"height":1250,"width":1250,"src":"\/\/www.roundaboutantiques.com.au\/cdn\/shop\/files\/amethyst_1b_371b1a1d-e2af-4c38-9698-549387ab2fa6.jpg?v=1686618996"},"aspect_ratio":1.0,"height":1250,"media_type":"image","src":"\/\/www.roundaboutantiques.com.au\/cdn\/shop\/files\/amethyst_1b_371b1a1d-e2af-4c38-9698-549387ab2fa6.jpg?v=1686618996","width":1250},{"alt":"John Deacons Scotland | Scotland the Brave Amethyst medium paperweight","id":46054291996900,"position":3,"preview_image":{"aspect_ratio":1.0,"height":1250,"width":1250,"src":"\/\/www.roundaboutantiques.com.au\/cdn\/shop\/files\/amethyst_1c_129f39bb-fcc8-4548-be50-1fbef75f92a4.jpg?v=1686618997"},"aspect_ratio":1.0,"height":1250,"media_type":"image","src":"\/\/www.roundaboutantiques.com.au\/cdn\/shop\/files\/amethyst_1c_129f39bb-fcc8-4548-be50-1fbef75f92a4.jpg?v=1686618997","width":1250},{"alt":"John Deacons Scotland | Scotland the Brave Amethyst medium paperweight","id":46054292095204,"position":4,"preview_image":{"aspect_ratio":1.0,"height":1250,"width":1250,"src":"\/\/www.roundaboutantiques.com.au\/cdn\/shop\/files\/amethyst_1d_380a74a7-565f-442e-b74f-63222291f23c.jpg?v=1686618997"},"aspect_ratio":1.0,"height":1250,"media_type":"image","src":"\/\/www.roundaboutantiques.com.au\/cdn\/shop\/files\/amethyst_1d_380a74a7-565f-442e-b74f-63222291f23c.jpg?v=1686618997","width":1250},{"alt":"John Deacons Scotland | Scotland the Brave Amethyst medium paperweight","id":46054292193508,"position":5,"preview_image":{"aspect_ratio":1.0,"height":1250,"width":1250,"src":"\/\/www.roundaboutantiques.com.au\/cdn\/shop\/files\/amethyst_1e_f42f0bc9-8f7e-4bdd-9262-b946a2a6a75c.jpg?v=1686618997"},"aspect_ratio":1.0,"height":1250,"media_type":"image","src":"\/\/www.roundaboutantiques.com.au\/cdn\/shop\/files\/amethyst_1e_f42f0bc9-8f7e-4bdd-9262-b946a2a6a75c.jpg?v=1686618997","width":1250}],"requires_selling_plan":false,"selling_plan_groups":[],"content":"John Deacons Scotland | Scotland the Brave \u003cbr\u003e\u003cspan data-mce-fragment=\"1\"\u003eAmethyst colour\u003cbr\u003eMedium size paperweight\u003c\/span\u003e\u003cbr\u003e\u003cbr\u003eA pair of crossed National flags of Scotland surrounded by a ring of Millefiori canes, interspersed with John Deacons Scotch Thistle signature canes | adhesive label to base\u003cbr data-mce-fragment=\"1\"\u003e\u003cbr\u003eApprox 6.5cms (2 1\/2\") wide\u003cbr\u003eApprox 5cms (2\") tall\u003cbr\u003e\u003cbr\u003eIn excellent condition\u003cbr\u003eGUARANTEED free from damage and repair"}
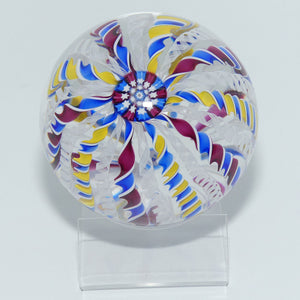
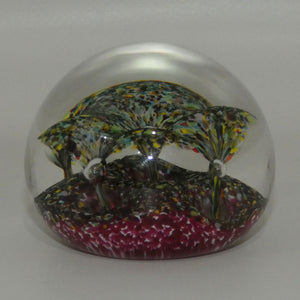
John Deacons Scotland the Brave medium paperweight | Amethyst


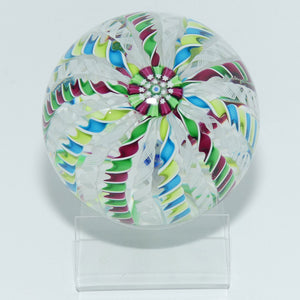
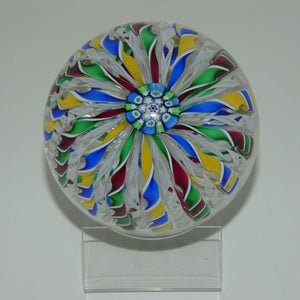
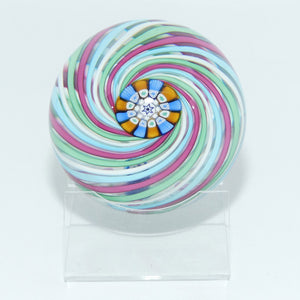
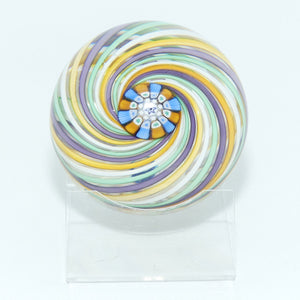
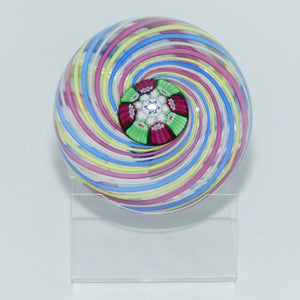
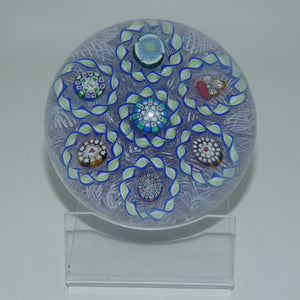
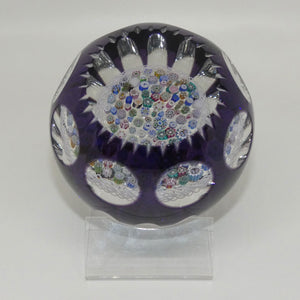
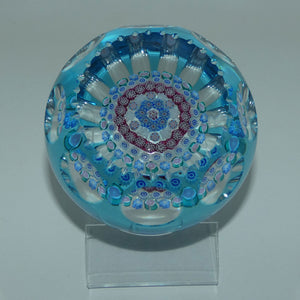
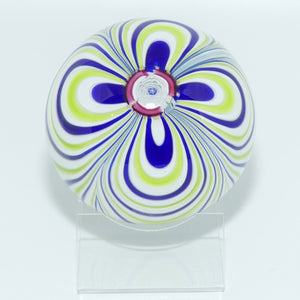
Related Products